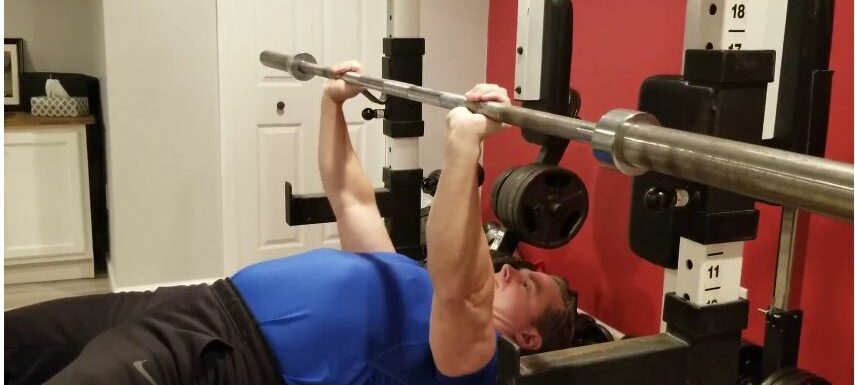
There’s something special about pushing exercises. Perhaps it’s the satisfaction of being powerful in being able to push yourself off the floor or pushing a weight off your chest. Certainly, there’s an ego component to it as well, given most judge their upper body strength by how many pushups they can do or how much they can bench.
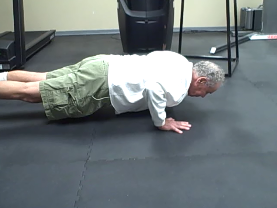
The pushup and bench press are also excellent exercises to build chest, shoulder, and arm strength, as well as bone density. There are the performance enhancements in sports as well as activities that require that require pushing, like getting off the floor, lifting/playing with kids, using a snow blower, or mowing the lawn.
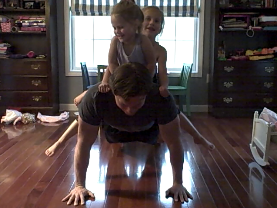
Unfortunately, many struggle to improve their bench press and pushup performance due to shoulder problems. Even worse, some will cause shoulder problems by doing bench presses and pushups.
Accordingly, I will show you several strategies and technique tweaks that will allow you to pushup and bench press without wrecking your shoulders. In fact, these might even fix your shoulder problems.
Check out some more strategies and tips for other exercises in my upcoming webinar Exercise Technique Mastery here.
Although the pushups and bench press are certainly distinctly different exercises, many of these strategies apply to both exercises given the elements they have in common.
10 Ways To Do Pushups And Bench Presses Without Injuring Your Shoulders
1. Use the right weight
Many pushup and bench press shoulder problems can be solved by simply using the proper weight. This is especially true with pushups. Most do not realize that most people are lifting 71-74% of their body weight when they begin from the floor. No amount of proper technique coaching will help if the load is simply too high. Incrementally increasing the height of the surface you are pushing from to reduce the load until you can properly execute the desired number of reps.
With the bench press, egos get in the way and can obscure judgment about how much weight should be utilized. Unfortunately, the shoulders often pay the price when too much load is used, and accordingly technique breaks down. A good rule of thumb is that the technique of your last repetition should look as good as your first repetition. If this is not possible, consider adjusting the weight until your technique is grooved. Whether you are using 90% of our maximum, or 50% of your maximum, your technique should look the same. If it doesn’t, lower the weight and/or repetitions until you engrain the right motor pattern so that your technique looks consistent regardless of the load you are using. This also gives your shoulder structures ample time to adapt to the challenges of the movement.
2. Set your arm angle at 45 degrees
Your arm angle likely will have a big impact on pain-free pressing. One of the most common arm angles that contributes to shoulder problems is when the hands and elbow are too high and are closer to shoulder height. This places a disproportionately high amount of stress on the shoulder joints and the smaller shoulder musculature relative to the larger pectorals. However, tucking the elbows to the sides and having the hands too low reduces the amount of stimulus to the intended target muscles , the pectorals.
One simple reference to achieve proper arm angle to position your arms as if you were about to shove someone away from you. This is likely the best position for your arms. Another reference point is to assure the bottom of your thumb is at the same level of the middle of your chest. This is approximately 1 inch up from where your ribs meet your breastbone. The arm pit angle between the upper arm and your torso should be approximately 45 degrees. Keep in mind that in order to achieve this proper arm angle during the bench press, you must position yourself so that when you are laying on the bench, the bar is over your throat, but no higher. More on this below.
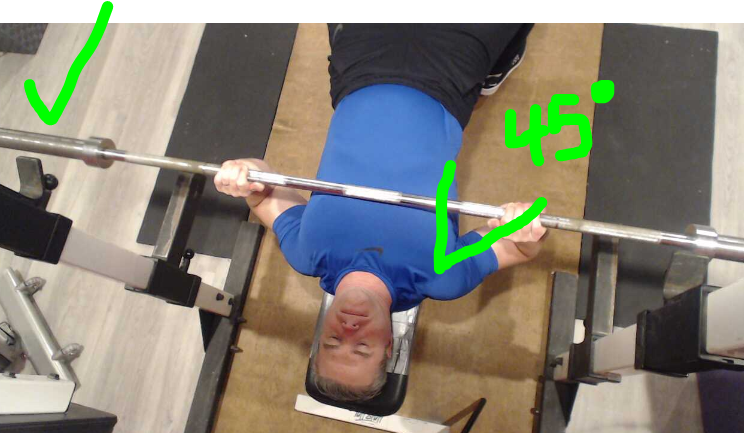
Proper bench press technique with arms at 45 degree angle
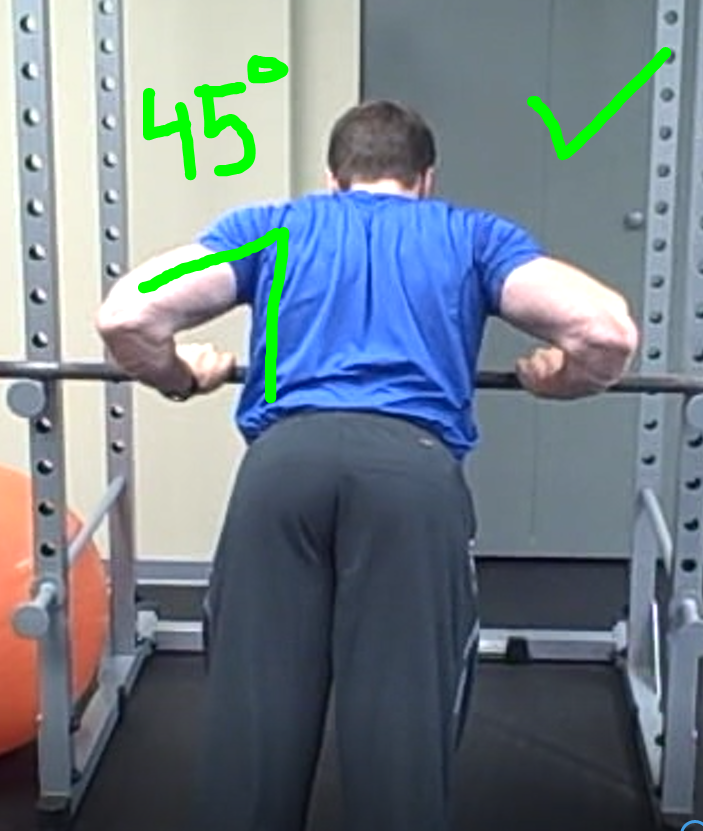
Proper pushup technique with arms at 45 degree angle
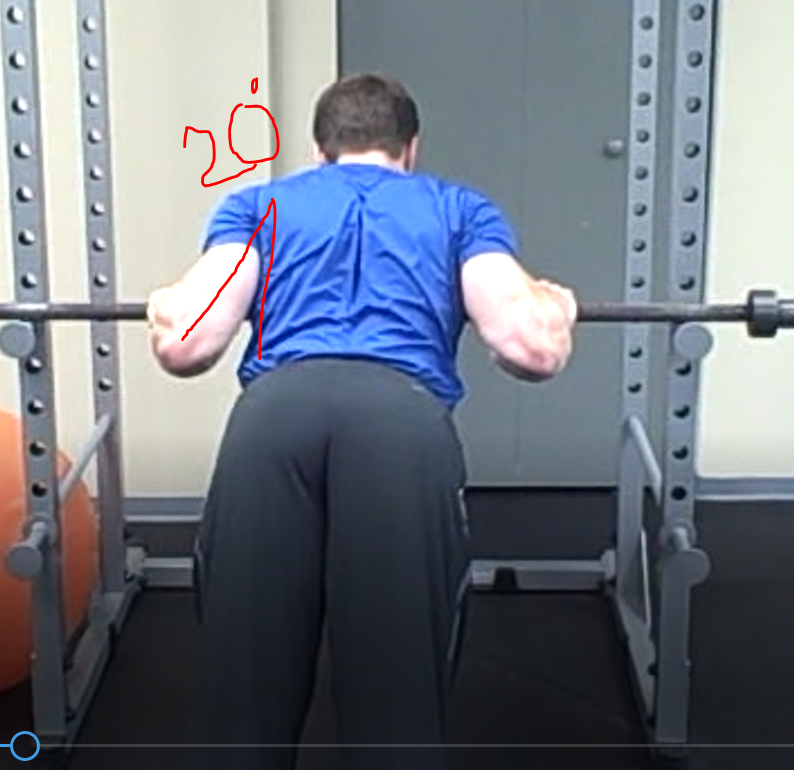
Improper pushup technique with arms at 20 degree angle (arms too close)
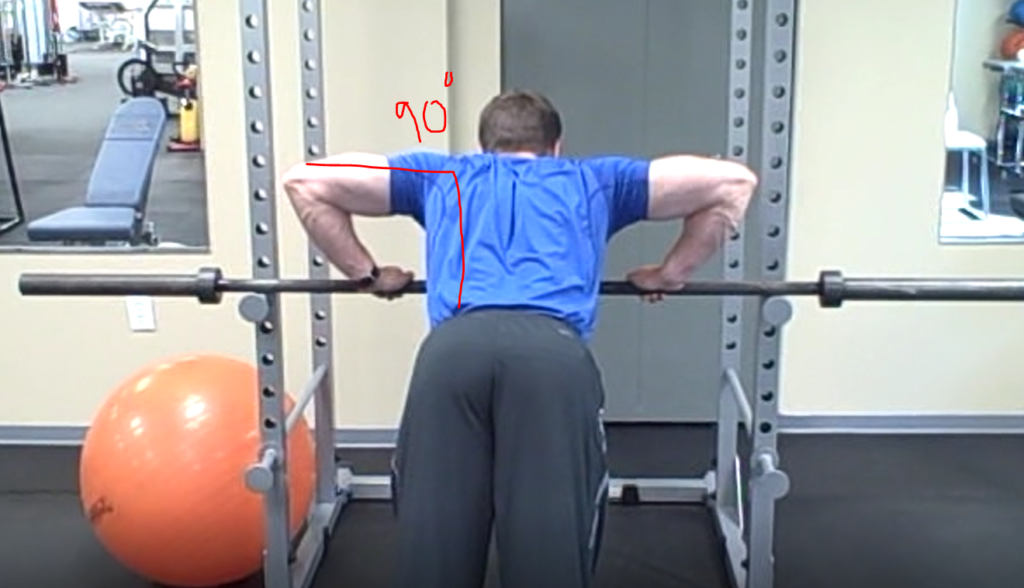
Improper pushup technique with arms at 90 degree angle (arms too high)
3. Set your hand width
This is an adjustment that I’ve seen significant variation in how it affects shoulder issues, so you’ll have to experiment with what works best for your body type. Most will feel best using the above imagery of shoving someone to determine the best hand width. I find having the width too narrow places most of the load on the triceps and makes it difficult to get the shoulder blades to retract (or squeeze), which is critical in facilitating pain free pressing. However, too wide increases the amount of stress on the shoulders. For most, having the base of the thumb at approximately the outermost edge of your shoulder width allows pain-free pressing.
4. Set the proper rack height
One of the most common errors in bench pressing happens before the movement even gets started. The height of the bar on the rack will make a big difference in making sure you begin and end the movement with the shoulder in its most stable position. Failing to do so will increase the chances that your shoulders will be working in a position of decreased stability, leading to poor distribution of load and possible shoulder injury.
Here’s how to assure a proper bar height during the set up: While holding your arms straight up over the middle of your chest, squeeze your shoulder blades down and back. Next, bend your elbow a few degrees. Your hands should now be approximately the height of where the bar should be placed on the rack. Now, practice with an unloaded bar. You should be able to barely move the bar over the lip of the rack only by slightly extending the elbows. If you have to release your shoulder blade position to lift the bar off the rack, then you likely have the rack too high. This will increase the chances that your shoulder blades, and thus your shoulder, move out of its most stable position and force you to press outside of your groove, or the most efficient bar path to increase shoulder stability. The goal is to produce the least amount of movement to get the bar off the rack and into your pushing groove.
Setting the rack height is really important for re-racking the weight as well. When you are fatigued, that last thing you want to do is to miss the rack because you are lowering it with your tired arms and misjudge the position of the rack. So it’s best to end your set by pressing straight up in your pressing groove, then with your elbows locked and shoulder blades set, allow the bar to slam on to the back post of the rack. This assures that you are now in a safe position to lower the bar and will not miss the rack. Most importantly, it keeps the shoulder in a stable position.
This is one of several reasons I prefer to have clients and patients press in a full or half rack versus a separate bench press rack. While most bench press set ups only allow you about 3 positions to set the bar at, a full or half rack allows you to select from dozens of positions. This assures you can find a position most suitable for your size.
Rack set at wrong height
Rack set at proper height, and re-racking weight
While the above mostly applies to barbell bench press, the same principles apply to pushups. Starting in the kneeling position, after you set your shoulder blades down and back, find your optimal hand and arm angle, and brace your core, extend your hips and knees so that your weight is distributed on your hands and toes. Now you are ready to initiate the pushup. This is also the position you should end your pushup prior to going to hands and knees. If you aren’t able to return to the position due to fatigue try to end by dropping to your hands and knees. Otherwise, by shifting your body to finish in full lock out you will likely move your shoulders out of your pressing groove and potentially cause some shoulder irritation.
5. Set your hand angle/grip
The way you position your hand on the floor or grip the bar can have an impact on your shoulder mechanics, and in turn your shoulder pain with pressing. Most shoulders are stronger and feel better when they reduce the amount of humeral internal rotation (arms turned inward). This is because internal rotation lengthens 2 of the rotator cuff muscles, exposing them to more stress. In addition, internal rotation may facilitate impingement of the supraspinatus and the biceps long head tendon. Changing the arm angle as above naturally reduces the degree of internal rotation. Changing the hand position can as well.
With pushups, you can reduce shoulder internal rotation by turning your fingers out.

Pushup with hands turned out
With the barbell bench press you can do this by using a false grip, which means moving the thumbs to the same side of the bar as the fingers. Moving the thumb allows you to slightly rotate your hand, and thus your shoulder. For those doing pushups off a bar, you can use the same technique.
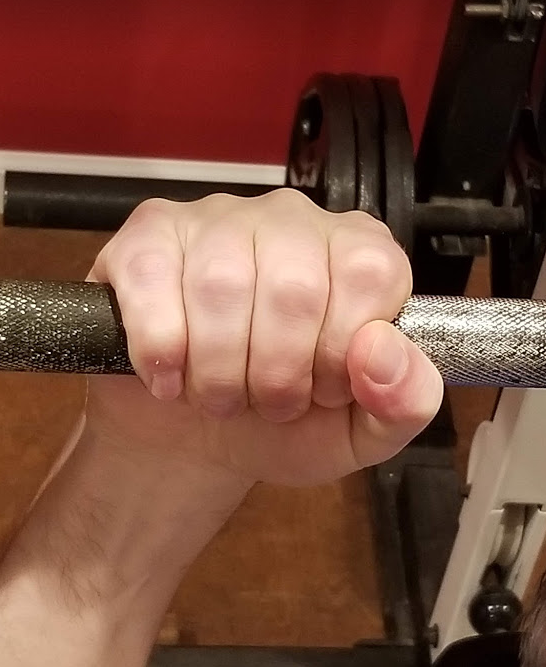
Regular Grip

False Grip
While it may take a little time to get used to using a false grip, many experienced lifters swear by this technique, and several clients/patients notice reduced shoulder pain by adopting this technique.
For those with shoulder instability, squeezing the bar extra firm seems to also reduce shoulder symptoms. Theoretically this may be related to the fact that, given the C5 myotome connection the forearm flexors and shoulder muscles share, higher activation of the grip muscles may enhance co-contraction of the shoulder muscles, thus increasing stability.
6. Engage your blades
Contracting the scapula muscles throughout the pushing movements is one of the most effective ways to reduce shoulder pain and improve strength with pushups and bench press. This needs to occur before lifting and only relaxed when the exercise is completed (for the bench press, this means when the bar is rested on the rack). The shoulder blades are the base of the shoulder joint, and the origin of most shoulder musculature including the rotator cuff. If the scapulae (shoulder blades) are not stable, the muscles that originate from it are not able to effectively do their job. In addition, the shoulder joint will not maintain its optimal stability to perform pushing functions.
Before we move on, I think it would be helpful to review common shoulder blade positions:

Protracted

Elevated
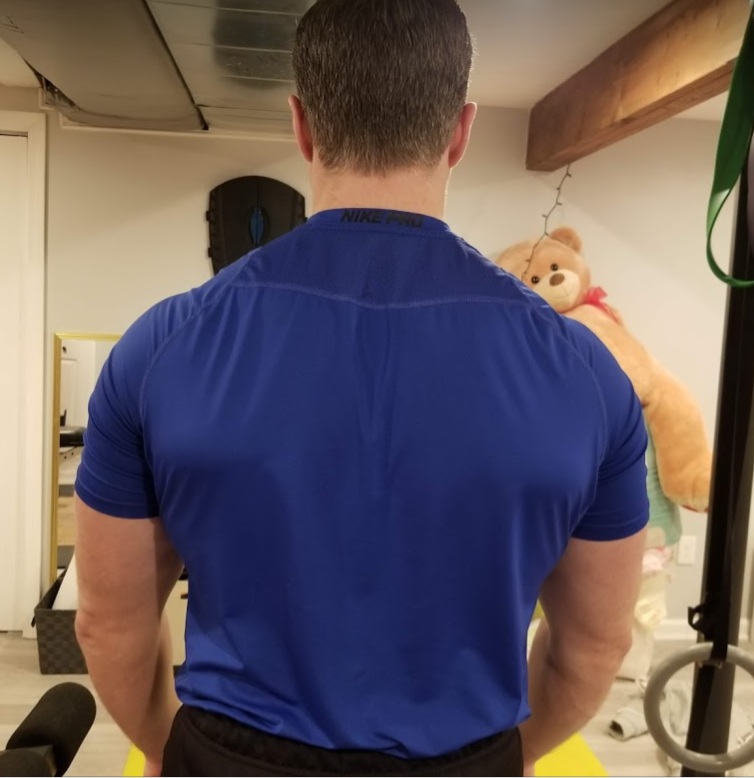
Neutral
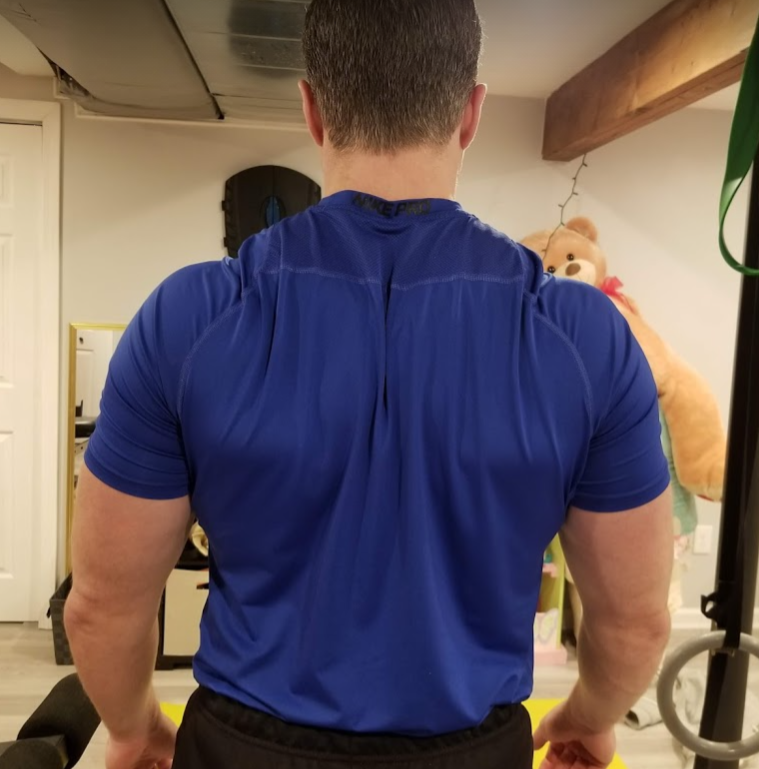
Retracted
There are 2 approaches to assuring the shoulder blades are optimally positioned to support pressing.
The first is to set your shoulder blades back and keep them pinched together for the entire set. While this is certainly easiest to teach and learn, I don’t believe it is optimal. The shoulder blades do need to function as a stable base to push from, however some movement is needed to keep the head of the humerus optimally positioning in the socket of the scapula.
Thus, the second philosophy is my preferred method. This involves tightening the shoulder blades at the onset of the motion in neutral, retracting the shoulder blades as the bar/chest is lowered, then allowing the blades to return towards neutral at the top of the movement. While this is a little more nuanced, I find this to be best tolerated by most. In both cases, cueing to squeeze the shoulder blades, avoid elevation (shoulders going up towards the ears) and protraction (hunching the shoulder blades forward) has a big impact on reducing shoulder problems.
Proper pushups from top and side views
Having the proper bar height, discussed above, is mostly designed to best facilitate proper scapula position at the beginning and end of the bench press.
7. Stay in your groove
As mentioned above, your arm angle will facilitate a more stable and powerful position to push from. This will establish your pushing groove, or the path the bar or your body takes when pressing. It’s the position where you derive the most power and joint stability throughout the pressing movement. This means force will be applied through a vector running through your mid sternum. For the bench press, this means the bar will travel in a mostly straight line through the sternum.
Proper bar path
Those who deviate from this “groove” often experience shoulder pain. Not engaging your shoulder blades will make it difficult to stay in your groove. Panicking when you are fatiguing and getting out of your groove will also cause problems. For that reason, having a good spotter or using pins in a power rack are excellent options so that you don’t compensate with bad form just to finish out the rep and keep you from being pinned under the bar. For pushups, not being afraid to drop to your knees when fatigue overwhelms proper technique is critical. Again, proper weight selection should make this a rare occurrence.
Finally, the start and finish of the pressing movement is crucial to maintain the proper pressing groove. One major error is starting with the bar or hands positioning too high over your face or head. This causes you to start too far from your optimal groove and increases the chance that your shoulders will be pushing from a suboptimal position. Instead, set up so that the bar is over your chin. This minimizes the distance between your start position and your optimal pressing groove, yet allows enough distance to clear the rack.

Optimal bar rack position relative to torso
8. Change the range
This may be the easiest way to reduce shoulder pain, especially for those who have recently recovered from an injury. Sometimes only a 1 or 2 inch reduction of depth can eliminate shoulder pain. Keep in mind that this ROM reduction does not have a huge negative effect on the ability to produce strength, so using this technique for several weeks of even months won’t severely compromise pushing strength. In short, you don’t lose much by shortening the ROM, but you might achieve a huge benefit of keeping the shoulders happy.
Using pins on the rack and towels or foam roll on/under your chest or even attached to the bar can be effective ways to objectively change the range of motion.
Towel for bench press
Foam pad on bar for bench press
Pins for bench press
Another similar modification unique to the barbell bench press is to switch to decline pressing. Some evidence suggests this increases activation of the pectorals while decreasing involvement of the shoulder. It changes the pressing groove so that it moves farther away from the shoulders, and slightly reduces range of motion. I’ve personally used this method as a way to continue pressing heavy after tearing a rotator cuff and herniating a disc in my neck. For years it was the only way I could press heavy without shoulder and neck pain. Interestingly, when I do return to flat bench, I do not notice that it negatively effects my flat bench performance, even though I very rarely perform flat bench. Consider switching to decline if you still want to press heavy and the other technique tweaks don’t work well for you on flat bench press.
Decline bench press
Finally, the floor press is a great way to significantly limit range of motion without using any other implements, like pins or towels. The only downside is that you must have a rack to safely perform these.
Floor press
9. Consider dumbbells or Pushups only
While the above suggestions to change arm angle and hand position are designed to provide and optimal shoulder groove, there’s only so much you can change the angle of your arm position when you are holding on to a bar when you are pushing. However, since dumbbells allow you far more degrees of freedom, You may feel better pressing with dumbbells. One major problem with switching to dumbbells, however, is that it is much more difficult to start and finish the movement. This is because you have to lift and lower the weights to the start and finish position, rather than resting them on a rack, or simply raising from, or dropping to a knee as with pushups. If you can skillfully manage this, however, trying out pressing with Dumbbells may be a good option.
Pushups provide a similar benefit as dumbbells in this regard, as they also allow greater flexibility in changing arm position.

Of course, this is only an option for those who are strong enough to do pushups from the floor, unless you have a specialized rehab table found mostly in rehab clinics. On the other end, those who are very strong discount the benefit of pushups because they are not challenging enough. This puts them in what seems to be a catch 22: heavy benching hurts their shoulders, but pushups don’t challenge them enough. Fortunately there is an excellent solution for this that allows you to replicate high forces similar to heavy benching yet maintain the positional advantages that pushups afford. I describe this in a video here: skip to the 6:55 mark.
10. Consider training 1 arm at a time
Often times one arm is weaker than the other. This may not be realized or corrected with pressing movements where both arms are functioning together. Thus, the problem and pain will persist. Switching to 1 arm dumbbell presses, 1 arm cable/band presses, and even 1 arm pushups (most need to do this elevated) may be good options. This way, the stronger arm will get its proper stimulus, and the weaker arm can start with a more appropriate load and groove its pressing pattern until it become more stable. At that point, you can consider returning to bilateral movements.
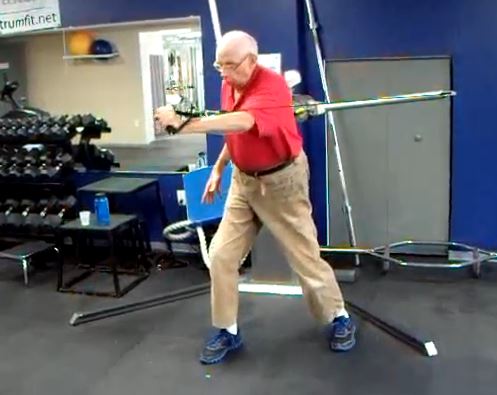
1-arm cable press
Keep in mind that there are several other variables to consider, such as exercise order, training to failure, training frequency, switching weight and load schemes, and more.
Don’t Ignore the Problem
The important thing is not to ignore the program. Pushing through it or stopping pressing all together are usually poor strategies that unfortunately are commonly used. This is what keeps clinics full of patients and many people frustrated.
There are multiple proven solutions to deal with shoulder pain. If pressing is a problem, don’t give up or ignore it. Try some of the above solutions. If you need help implementing these or want more of an in-depth assessment of your exercise program, we’re here for you. Click here to reach out.
